The following computer scripts are freely provided under GPLv2.
Please note, the scripts come without any guarantees or warranties, and that their use is entirely at your (the user's) own risk.
Click on the program to jump to the download/instruction place holder.
Before downloading any files, please read www.CRANIOFACIALidentification.com's Terms of Use.
![]()
![]()
![]()
![]()
![]()
![]()
![]()
![]()
![]()
![]()
![]()
************************************************************************
SkullXtremes has been released in conjunction with:
Caple JM & Stephan CN. (2017) Photo-realistic statistical skull morphotypes: new exemplars for ancestry and sex estimation in forensic anthropology. Journal of Forensic Sciences; 62(3):562-72.
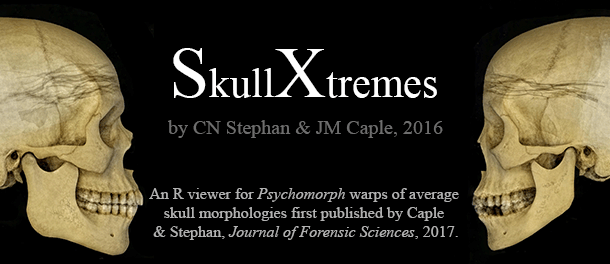
Overview: SkullXtremes is an R picture viewer enabling visualization of average skulls and extreme warps (0-100%) for 18 sex and ancestry groups, in colour, as produced in Psychomorph and described in the above mentioned paper. The option is provided within the viewer for high-resolution colour image download of selected warps via the internet (requires active internet connection).
SkullXtremes requires 7-zip for extracting 7-zip compressed files during file installation. SkullXtremes also works best at >=1920x1080 screen resolution.
All high-resolution full colour skull averages (no warps) are available here as a .7z extractable folder.
Code: R (>=3.0.1 windows)
Latest Version: v2017.0
Depends: R, 7-Zip; www.CRANIOFACIALidentification.com's Terms of Use
License: GPLv2
Instructions:
1. Install R and 7-zip.
2. Save the the SkullXtremes logo and the SkullXtremes support files to the path: C:\Program Files\R\R-[version]\doc\html.
3. Extract the compressed support files using 7-zip.
4. Download the SkullXtremes script to a local directory with file extension ".r".
5. Open R, and from the 'File' menu, select the option "Source R code...", then find the SkullXtremes.r script, previously saved in step four, to launch the program.
6. SkullXtremes will automatically download any R packages it needs, if you have not previously installed them. Consequently, you may have to set your download mirror at the prompt, if these other downloads are necessary.
7. Once the program loads select your base and reference skulls to begin the visualisations.
Note:
a)
The SkullXtremes support files are 2.1 GB in total (18,204 image files). Please ensure you have 4.3 GB of space available prior to downloading SkullXtremes.Download may take between 20min-3hrs, depending on your internet connection speed (1GB and 100 mbps speeds, respectively).
b) Due to contour line proximities in Psychomorph, images at high warp values (e.g., 70+) may display visible image artefacts where contour lines mapping the shape are forced to intersect / overlap.
Version History:
v2017.0 (first release)
Kran-o-drive is released in conjunction with the forthcoming paper:
Stephan CN, Bultitude H, Nicholson A, Armstrong B. Science-Based Craniofacial Superimposition: A Kran-o-tron Mechatronics Solution to Augment Perspective-X. In preparation.
Overview: This Python code is the controller for the Kran-o-tron Craniofacail Superimposition Rig Developed at the HuCS-ID Lab. Code is also available at https://github.com/Kran-o-tron.
Zipped directory of files are available here Kran-o-drive
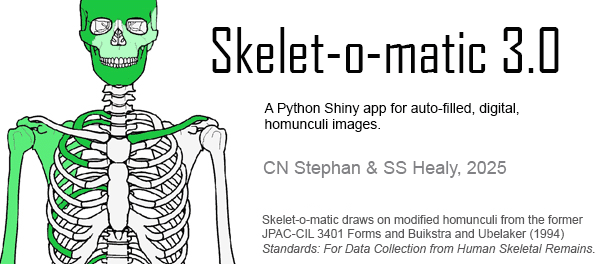
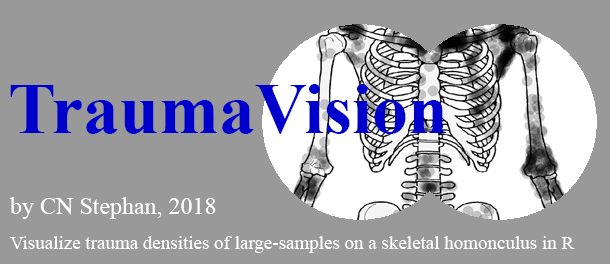
Code: Python Instructions: Version History: Skelet-o-matic: The original and first digital auto-fill homunculus capability. Overview: Generate .png, .jpg and .tiff homunculus image files, in seconds without tedious by-hand coloring or drawing! This is the world's first digital autofill homunculus image generator. Select 2 tone (present/absent) or 4 tone (complete/incomplete/fragmentary/absent) charts as applicable to adult skeleton outlines. Code: Python Shiny Instructions: Version History: TraumaVision has been released in conjunction with the forthcoming chapter: Overview: Record and plot locations of trauma on a skeletal homonculus for large assemblages to visualise trauma distributions and densities. Code: R Instructions: Note: TraumaVision is preset to produce an image with plot width of 144 and height of 97. This size can be customized from within the .r file itself. A standard homonculus for TraumaVision is anticipated to be released once necessary reproduction approvals are in place. In the meantime analysts can use their own homonculi. Version History: EasyECD has been released in conjunction with: Overview: Conduct automated IrisPlex analysis of SNP data, from QuantStudio qPCR results to estimate eye colour from DNA. Code: R (>=3.0.1 windows) Note: EasyECD is designed to run on .csv files of QuantStudio qPCR results. If you wish to calculate medical performance statistics you will also require a .csv file of ground truth eye colours. Exemplar formatting of each can be found here: example qPCR file; and example ground truth file. Version History: SkullProfiler has been released in conjunction with: Overview: SkullProfiler is a GUI based capability for estimating ancestry and sex from lateral skull photographs. Code: R (>=3.0.1 windows) Version History: BodyPlot has been released in conjunction with: Note: User's should check all height and mass data falls in the y- and x-lim ranges, and/or adjust code to ensure this is the case. For both plots the program takes three columns of data in .csv format, each column with a header on the first row: for BMIplots mass (kgs) should be in the first column followed by height (mm) in the second column; and for SOMATOTYPEplots the first column should be the x variable and the second column the y. Enter sex labels in a third column using "M" to designate males and "F" for females. Version History:
Latest Version: v2020.0 (original release)
Depends: Python (if running on Windows machine it will also require a Bash install) www.CRANIOFACIALidentification.com's Terms of Use
License: GPLv2
Designed to run with Raspberry Pi on Unix.
See above for latest release.
Version 4 is in the pipeline to include multiple subadult chart options!
Latest Version: 3.0
Depends: Windows only, www.CRANIOFACIALidentification.com's Terms of Use
License: GPLv2
1. Save the Skelet-o-matic .exe executable file to a preferred location of your hard drive.
2. Double click the 'Skelet-o-matic3.0.exe' file to launch the program.
3. Work your way down the menu box at the left side of the screen to:
a - set your preferred image file name;
b - select 'color' or 'grey scale' homunculus theme;
c - select legend type for template;
d - load homunculus outline;
e - set file extension for image download;
f - select relevant skeletal elements using your mouse and the checkboxes and radiobuttons provided (A = absent, C = complete, I = incomplete, F = fragmentary; for present/absent only use A and C options); and
g- calculate the fill and download the homunculus.
A short 1 min video demo is available here.
Demo audio track credit: 'Acoustic Inspiring Groovy' performed by Heavenless via Adobe Stock.
Fill calcuation time for a complete skeleton (the heaviest option) is approx. 15 seconds.
Fewer skeletal elements result in faster calculation times.
Run times will depend on individual computer CPU power/speeds.
Three laptop examples with associated image generation times are provided below, as a guide:
Microsoft Surface Book 2, i7-8650U1.9GHz, 16GB RAM, Nividia GeForce GTX1050 = 49.1 sec
Dell Precision, i7-12800H (12th Gen) 2.4GHz, 32GB RAM, Nividia RTXA2000 8GB = 17.2 sec
Alienware Rx 16, Ultra 9 185H 2.3GHz, 32 GB RAM, Nividia GeFORCE RTX4080 = 10.1 sec
When you first open the program, it will take about 8 sec to load.
Please note Skelet-o-matic 3.0 only works on Windows machines. It is not compatible with Max or Linux OS.
Per the licensing and use terms, ensure you provide the three necessary citations in any work(s) where Skelet-o-matic 3.0 and/or its components/products are used.
Versions earlier than 3.0 hold substantial image run times compared to the 3.0 python version and subsequently are not available for general access. Earlier versions are only available upon special request and at the sole discretion of CN Stephan.
2.0 (2024) - R Shiny (image runtime = approx. 45 sec)
1.0 (2016) - VBA in Microsoft Excel (image runtime = 2-4min)
Stephan CN, Caple J, Atkins J, Lynch J, Meikle B, Fisk W. Skeletal Evidence of Sharp–Force Disarticulation and Tissue Flensing in 54 Cases Exhibiting Approximately 4,200 Bone Strike Injuries. In Cuhna E and Ross A (Eds.) Dismemberment: Perspectives in Forensic Anthropology and Legal Medicine. Elsevier. 2018. In press.
Latest Version: v2018.0
Depends: R, www.CRANIOFACIALidentification.com's Terms of Use
License: GPLv2
1. Install R.
2. Save the the TraumaVision logo to the path: C:\Program Files\R\R-[version]\doc\html.
3. Download the TraumaVision R script to a local directory with file extension ".r".
4.
Save your desired skeletal homonculus as a .png under the file name "TraumaHomonculus.png" in your working directory.
5. Open R, and from the 'File' menu, select the option "Source R code...", then find the EasyECD script, previously saved in step 3, to launch the program.
6. TraumaVision will automatically download any R packages it needs, if you have not previously installed them. Consequently, you may have to set your download mirror at the prompt, if these other downloads are necessary.
7. Follow the on-screen instructions and use the left mouse button to record trauma locations on the homonculus.
8. To plot trauma for all cases, click the "Plot All Cases" button. Click "Exit" to close the program.
9. Cropping of the trauma plot to remove plot axes is required in third party imaging software.
v2018.0
Rollo RF, Ovenden JR, Dudgeon CL, Bennett MB, Tucker K, Stephan CN. (2018) The Utility of the IrisPlex System for Estimating Iris Colour of Australians from their DNA. Forensic Science International. Under Review
Latest Version: v2018.1
Depends: R, qPCR, and citations to Walsh et al. (2011) and Rollo et al. (2018) as per www.CRANIOFACIALidentification.com's Terms of Use
License: GPLv2
1. Install R.
2. Save the the EasyECD logo to the path: C:\Program Files\R\R-[version]\doc\html.
3. Download the EasyECD R script to a local directory with file extension ".r".
4. Open R, and from the 'File' menu, select the option "Source R code...", then find the EasyECD script, previously saved in step 3, to launch the program.
5. EasyECD will automatically download any R packages it needs, if you have not previously installed them. Consequently, you may have to set your download mirror at the prompt, if these other downloads are necessary.
6. Follow the on-screen instructions.
v2018.1 includes additional capability to effortlessly calculate medical performance statistics using ground truth data
v2018.0 first release - same code as used in Rollo et al. (2018) for colour probability calculations
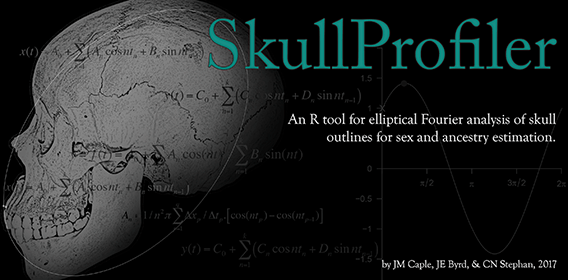
Caple JM., Byrd JE. Stephan CN. (2018) Utility of EFA for estimating ancestry and sex from lateral skull photographs. Forensic Science International; In review.
Latest Version: v2017.0
Depends: R, www.CRANIOFACIALidentification.com's Terms of Use
License: GPLv2
Instructions:
1. Install R.
2. Save the the SkullProfiler logo to the path: C:\Program Files\R\R-[version]\doc\html.
3. Download the SkullProfiler R script to a local directory with file extension ".r".
4. Open R, and from the 'File' menu, select the option "Source R code...", then find the SkullProfiler script, previously saved in step 3, to launch the program.
5. SkullProfiler will automatically download any R packages it needs, if you have not previously installed them. Consequently, you may have to set your download mirror at the prompt, if these other downloads are necessary.
6. Follow the on-screen instructions and/or refer to the SkullProfiler Manual available here.
7. A calibration photograph is also avaliable here to cross-check photography settings and scale to ensure all photographs are captured in accordance with SkullProfiler standards as described in Caple et al. (2018).
v2018.0
v2017.0 (first release)
Stephan CN, Preisler R, Bulut O, Bennett M. (2016) Turning the tables of sex distinction in craniofacial identification: Why females possess thicker facial soft tissues than males, not vice versa. American Journal of Physical Anthropology. 2016; 161: 283-295.
And
Stephan CN, Meikle B, Bennett M. (2021) Body mass in Human Facial Soft Tissue Thickness Research: A Lurking Variable Widely Misinterpreted for Other Effects. Forensic Science International. In review.
Overview: Scatterplot mass and height of subject data against World Health Organization (2015) sectioning points for body-mass-index or generate somatotype plot according to Norton and Olds (1996) sectioning points.
Code: R (>=3.0.1 windows)
Latest Version: v2021.0
Depends: R, www.CRANIOFACIALidentification.com's Terms of Use
License: GPLv2
Instructions:
1. Install R.
2. Save the the Bodyplot logo to the path: C:\Program Files\R\R-[version]\doc\html.
3. Download the BodyPlot script to a local directory with file extension ".r".
4. Open R, and from the 'File' menu, select the option "Source R code...", then find the BMI plot script, previously saved in step 2, to launch the program.
5. Follow the on-screen instructions.
v2017.0 data point opacity included aswell as jitter for somatotype plots
v2014.0 first release - no opacity of data points or jitter in somatotype plot
PerspecitveX has been released in conjunction with:
Stephan CN. (2015) Perspective Distortion in Craniofacial Superimposition: Logarithmic Decay Curves Mapped Mathematically and by Practical Experiment. Forensic Science International; 257: e1-e8
AND
Stephan CN. (2017) Estimating the skull-to-camera distance from facial photographs for craniofacial superimposition. Journal of Forensic Sciences 2017;62(4):850-60.
Overview: Enter your parameters to calculate theoretical perspective distortion in 2D photographs and/or calculate face-to-camera distance (m).
Code: R (>=3.0.1 windows)
Latest Version: v2016.0
Depends: R, www.CRANIOFACIALidentification.com's Terms of Use
License: GPLv2
Instructions:
1. Install R.
2. Save the the PerspectiveX logo to the path: C:\Program Files\R\R-[version]\doc\html.
3. Download the PerspectiveX R script to a local directory with file extension ".r".
4. Open R, and from the 'File' menu, select the option "Source R code...", then find the PerspectiveX script, previously saved in step 3, to launch the program.
5. PerspectiveX will automatically download any R packages it needs, if you have not previously installed them. Consequently, you may have to set your download mirror at the prompt, if these other downloads are necessary.
6. Follow the on-screen instructions.
Version History:
v2016.0 includes both Subject-to-Camera Distance Calculator and Perspective Distortion Calculator
v2015.0 first release - only Persepective Distortion Calculator included
TDStats has been released in conjunction with: Stephan CN, Simpson EK, Byrd JE. (2013) Facial soft tissue depth satistics and enhanced point estimators for craniofacial identification: the debut of the shorth and 75-shormax. Journal of Forensic Sciences 58(6): 1439-1457.
Overview: At the click of a button, conduct automatic and comprehensive exploratory analysis of facial soft tissue depths, to include multiple plots (boxplots, histograms, density plots and violin plots) and the calculation of enhanced central tendency descriptors, including the shorth and 75-shormax.
Code: R (>=3.0.1 windows)
Latest Version: v2018.0
Depends: R, www.CRANIOFACIALidentification.com's Terms of Use
License: GPLv2
Instructions:
1. Install R.
2. Save the the TDStats logo to the path: C:\Program Files\R\R-[version]\doc\html.
3. Download the TDStats R script to a local directory with file extension ".r".
4. Open R, and from the 'File' menu, select the option "Source R code...", then find the TDStats script, previously saved in step 3, to launch the program.
5. TDStats will automatically download any R packages it needs, if you have not previously installed them. Consequently, you may have to set your download mirror at the prompt, if these other downloads are necessary.
6. Follow the on-screen instructions, then sit back and let the computer do the hard work for you! Depending on how much data/studies you have, it might take a few minutes for your computer to produce all the graphs/info.
Note: TDStats is designed to run on facial soft tissue depth data saved as a .cvs file and possessing the same basic layout as the C-Table, i.e., three header rows and with supporting data in the 10 columns before the soft tissue depth data. Most problems in running the script stem from not having the data correctly formatted. There must be AT LEAST one study in the dataset, with a sample size >10, for TDStats to work.
Version History:
v2018.0 autopopulates default landmark numbers at landmark input; only compatible with C-Tables equal to or higher than v2017.1
v2017.1 provides opacity of datapoints on .pdf age plots; this version only compatible with C-Tables equal to or higher than v2017.1
v2014.2 compatible with C-Tables up to but not including v2017.1
v2014.1 first release; compatible with C-Tables up to but not including v2017.1
TDValidator has been released in conjunction with a forthcoming review paper:
Stephan CN, Meikle B, Freudenstein N, Taylor R, Claes P. (2019) Facial soft tissue thicknesses in craniofacial identification: data collection protocols and associated measurement errors. Forensic Science International. In review.
Overview: This R tool will claculate error metrics for mean facial soft tissue thickness estimators including mean error (mm & %), absolute mean error (mm & %) and standard error of the estimate (mm) using out-of-sample C-Table data as the test set. The script enables subsetting of the C-Table data by author(s), method and sample type.
Code: R (>=3.0.1 windows)
Latest Version: v2018.0
Depends: R & the C-Table; www.CRANIOFACIALidentification.com's Terms of Use
License: GPLv2
Instructions:
1. Install R.
2. Save the the TDValidator logo to the path: C:\Program Files\R\R-[version]\doc\html.
3. Download the TDValidator R script to a local directory with file extension ".r" and the C-Table cvs file to the same directory.
4. Open R, and from the 'File' menu, select the option "Source R code...", then find the TDStats script, previously saved in step 3, to launch the program.
5. TDValidator will automatically download any R packages it needs, if you have not previously installed them. Consequently, you may have to set your download mirror at the prompt, if these other downloads are necessary.
6. Follow the on-screen instructions, then sit back and let the computer do the hard work of error calculations for you! Errors are calculated in seconds and outputted to a summary .txt file.
Version History:
v2018.0 (first release)
QuickCapture has been released in conjunction with: Stephan CN and Guyomarc'h, P. (2014), Quantification of perspective-induced shape change of clavicles at radiography and 3D scanning to assist human identification. Journal of Forensic Sciences 2014;59(2):447-53.
Overview: Collect landmark co-ordinates from 2D binarized shapes, with automated semilandmark spacing, using one of three landmark capture methods:
1. Equidistantly spaced landmarks on a closed contour.
2. A single quantity of equidistantly spaced landmarks between a set of pre-specified landmarks.
3. Different quantities of equidistantly spaced landmarks between a set of pre-specified landmarks.
Code: R (>=3.0.1 windows)
Latest Version: v2014.1
Depends: R, Conte function described by J. Claude in Morphometrics with R (Springer: New York, 2008), www.CRANIOFACIALidentification.com's Terms of Use.
License: GPLv2
Instructions:
1. Install R.
2. Save the the QuickCapture logo to the path: C:\Program Files\R\R-[version]\doc\html.
3. Download the QuickCapture script to a local directory with file extension ".r".
4. Open R, and enter the Conte function described by J. Claude in Morphometrics with R (Springer: New York, 2008, p.47.
5.
From the 'File' menu in R, select the option "Source R code...", then find the QuickCapture script, previously saved in step 3, to launch the program.
6. QuickCapture will automatically download any R packages it needs, if you have not previously installed them. Consequently, you may have to set your download mirror at the prompt, if these other downloads are necessary.
7. Follow the on-screen prompts to capture your landmarks.
Note: QuickCapture works best on pre-binarized images that are <100KB in size.
Version History:
v2014.1 (first release)
The Library Tracker: Is a free, handy, way to electronically manage an academic book library that is regularly subject to loans by lab staff/students.
Overview: The Library Tracker is a VBA powered Microsoft® Excel® workbook designed to check-in and out books using an electronic barcode scanner paired with barcoded staff lab badges. While the program will handle typed named entries, it works best with barcoded badges and a known group of borrowers.
The library is supplied as a blank shell populated only with one book and user entry example.
Consequently, the workbook file will need to be populated with your own library and users group details prior to use.
Code: VBA
Latest Version: v2018.0
Depends: Microsoft® Excel®, a USB barcode scanner, www.CRANIOFACIALidentification.com's Terms of Use.
License: GPLv2
Instructions:
1. Create a directory named "Library_Tracker" on your C:\ drive.
2. Save the the LibraryTracker.xlsm file to this directory, along with the LibraryTracker.jpg file.
3. Open the .xlsm file, then close the dialogue box, to populate the reference data sheets.
4. Enter all book details, row-by-row, into the Book Library tab. Use a USB barcode scanner to enter each book's barcode.
5.
Scan staff/student badge numbers and enter corresponding user names into the Users tab.
6. Relaunch the program and you are now ready to check-out and check-in items from your library, using the scanner, and without any requirement for typing.
7. To make an loan/return, scan the lab badge of the user at the diaologue box, then the book's barcode. Click the red "Borrow" button to check-out a book and the green "return" button to check-in a book. "Borrow" will automatically add the book and user to the Current Loans tab with an accompanying time stamp and will highlighted the book in red in Book Library tab. Upon return of the loan, user and book details are moved to the history tab, and the book reactivated in the collection. Instant auditing can be achieved by reviewing the Current Loans tab or the Book Library tab.
Notes:
- The Lock function of the current version is disabled.
- Library Tracker is designed for use by the Lab Head or Librarian only (not multiple users).
- To customize dialogue boxes with your own lab's name, either customise the Borrow form yourself or send me an email request with details for a custom LibraryTracker.xlsm file.
Version History:
v2018.0 (first release)